

Special Thanks to Jim Hensel for sharing this idea, photos, and directions.
Background: I am making my own hive boxes. I have researched handles and the choices are as follows:
- Cleat
- Dado slot
- Canoe shaped routed pocket
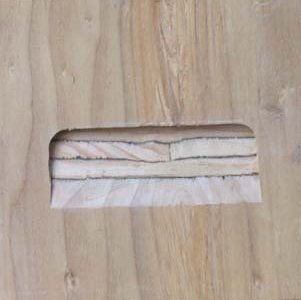
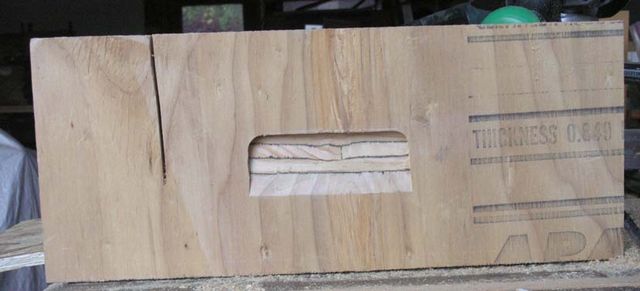
But I wanted something more. I noticed that many “store bought” boxes have a routed pocket, but the bottom side is sloped. I live where it rains a lot and this sloped bottom handle seemed to avoid water pooling at the bottom of the slot… I WANTED THIS STYLE HANDLE.
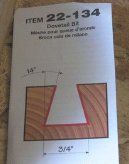
- This uses a router and a 14 degree dovetail bit. Buy the ¾” one if you have to buy one although the ½” one will do.
- It turns out that to make a pocket that is 1 ½” tall and 3/8” deep at the top and flush at the bottom is a 14 degree angle. And the most common dovetail bit is a 14 degree bit. Go figure.
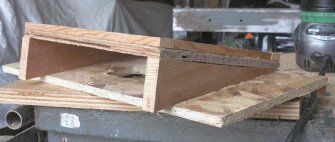
- The idea is to have the router on an angle to the surface of the wood. Using a 14 degree slope on the jig and a 14 degree bit means that the cut at the top of the pocket will be perpendicular to the surface. That is, the two 14’s cancel each other out so you get a nice grip at the top of the pocket.
- Start with a scrap of plywood. I would suggest 3/8” or ¼”. I used 1/2 “and it made the distance the bit has to plunge too deep and the bit would barely make it. If the plywood and the OSB scrap were both ¼”, the whole system would work better.
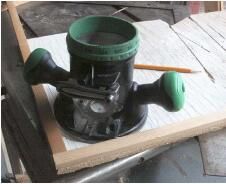
- Grab some 3/8” by ¾” scraps to use as cleats. At a corner of the plywood set two cleats in place and the router. Make a mark on the plywood at the very center of the router – center of the bit.
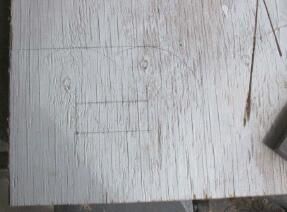
- Remove cleats and router from plywood. Using a square, make a line both directions from that point. The measure up 1½ inches and make another line. As to the width of the pocket, I make mine comfortable for my large GLOVED hands. Just lay your hand down and make a mark. Draw a vertical line through this mark. You should now have a rectangular box drawn on the page. Place the router over the three other points and draw and line around the outside of the router base. Using the square, you should be able to draw two lines that just touch the arc lines. You now have a box described by the two cleats and these lines. But you want to create room to nail on cleats along these lines so draw another line ¾” outside these two lines. I still need to make room for the cleats along the two lines. Just lay cleats adjacent to the outside of these lines and make another line. Cut the plywood along these outer lines.
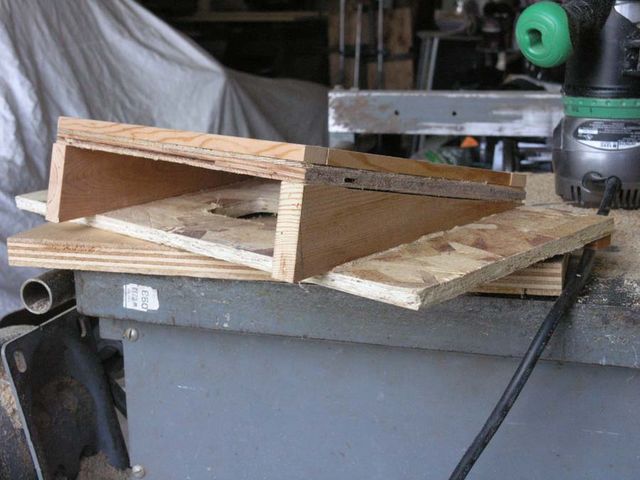
- Cut the base plywood to 18 ¼” by 8”. Glue and nail a cleat to on long side (not to the edge, but to one side along one edge. This will make a fence to align your box piece.
- Mark 8 ¼” from one edge and make a mark on the edge that has the cleat.
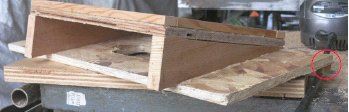
- Make two 14 degree wedges. I use a tapering jig, but the adjustable ‘T’ pusher on the table saw should be close enough.
- Assemble the top and the wedges with glue and nails. Attach cleats at outer edge of the top of the plywood. These cleats are the boundary for the router.
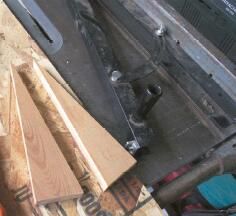
- Attach to base. Align the center-line of this wedge piece to the 8 ¼” line, flush with the edge of the lower piece (cleated side is down, but along that same edge. Again the thinner the base, the easier it is to make the router bit work.
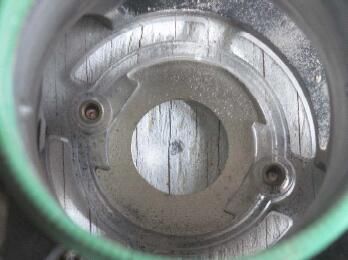
- Plunge route set to about ½” the plywood, then the OSB and finally the box part which is clamped below the OSB. Align the right edge of the OSB with the edge of the side of a hive box for a centered handle. Align to the left for an end box part.
- Lessons learned: Use thinner plywood and OSB. I used a Freud ½” collet Bit.
![Not All Flowers Are Friendly: Honeybee vs. Milkweed [Must-See Video]](https://beevac.com/wp-content/uploads/2025/06/milkweed-blooms-1340941-400x250.jpg)

Thank you very much for sharing this with all of us! This is an outstanding idea. I have tried cutting the handle slot with just the router and I too didn’t like the flat bottom slot where it can catch water. This will solve that problem. Great Job!!
If you have a table saw you can build a jig to use the saw to make the handle. The idea is to have a pair of shims perpendicular to the blade that are cut so that the box, as it rests on them, will be just above the blade and long enough so that when the box is slid down them it comes to rest on the table (about 2.5 inches). The blade height should be set to the depth of the handle. The end of the shims should be set so that they are the distance from the top of the box you want the handle away from the blade. Clamp rails to the table to hold the box in place as it is slid. Now slide the box down the shim with the saw in motion and when it gets to the table hold it still and stop the blade. Remove the box. The slower you go the smoother the cut will be.
sure would like to know how he gets his to cut with a dado blade , is it woobler , or stacked blade , ive order a var,blade from sears , and have the jig made and ready to cut . [email protected] sure would like see this on a drawing .